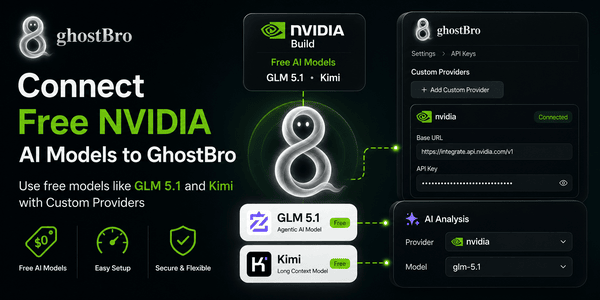
How to Connect Free NVIDIA AI Models (GLM & Kimi) to GhostBro.app
GhostBro supports custom AI providers, allowing you to connect AI models from platforms such as NVIDIA Build and use them directly inside your workflow.
One of the biggest advantages of NVIDIA Build is that many models can be used for free, making it possible to get started with GhostBro.app without paying for a commercial AI provider.
In this guide, we’ll connect the GLM 5.1 model from NVIDIA Build and configure it inside GhostBro.
By the end of this tutorial, you’ll be able to use free NVIDIA-hosted AI models for meeting transcript analysis, summaries, smart suggestions, and other AI-powered workflows supported by the selected model.
Step 1: Create a Free NVIDIA Build Account
Create an account at:
Registration is free and gives you access to NVIDIA’s growing catalog of AI models.
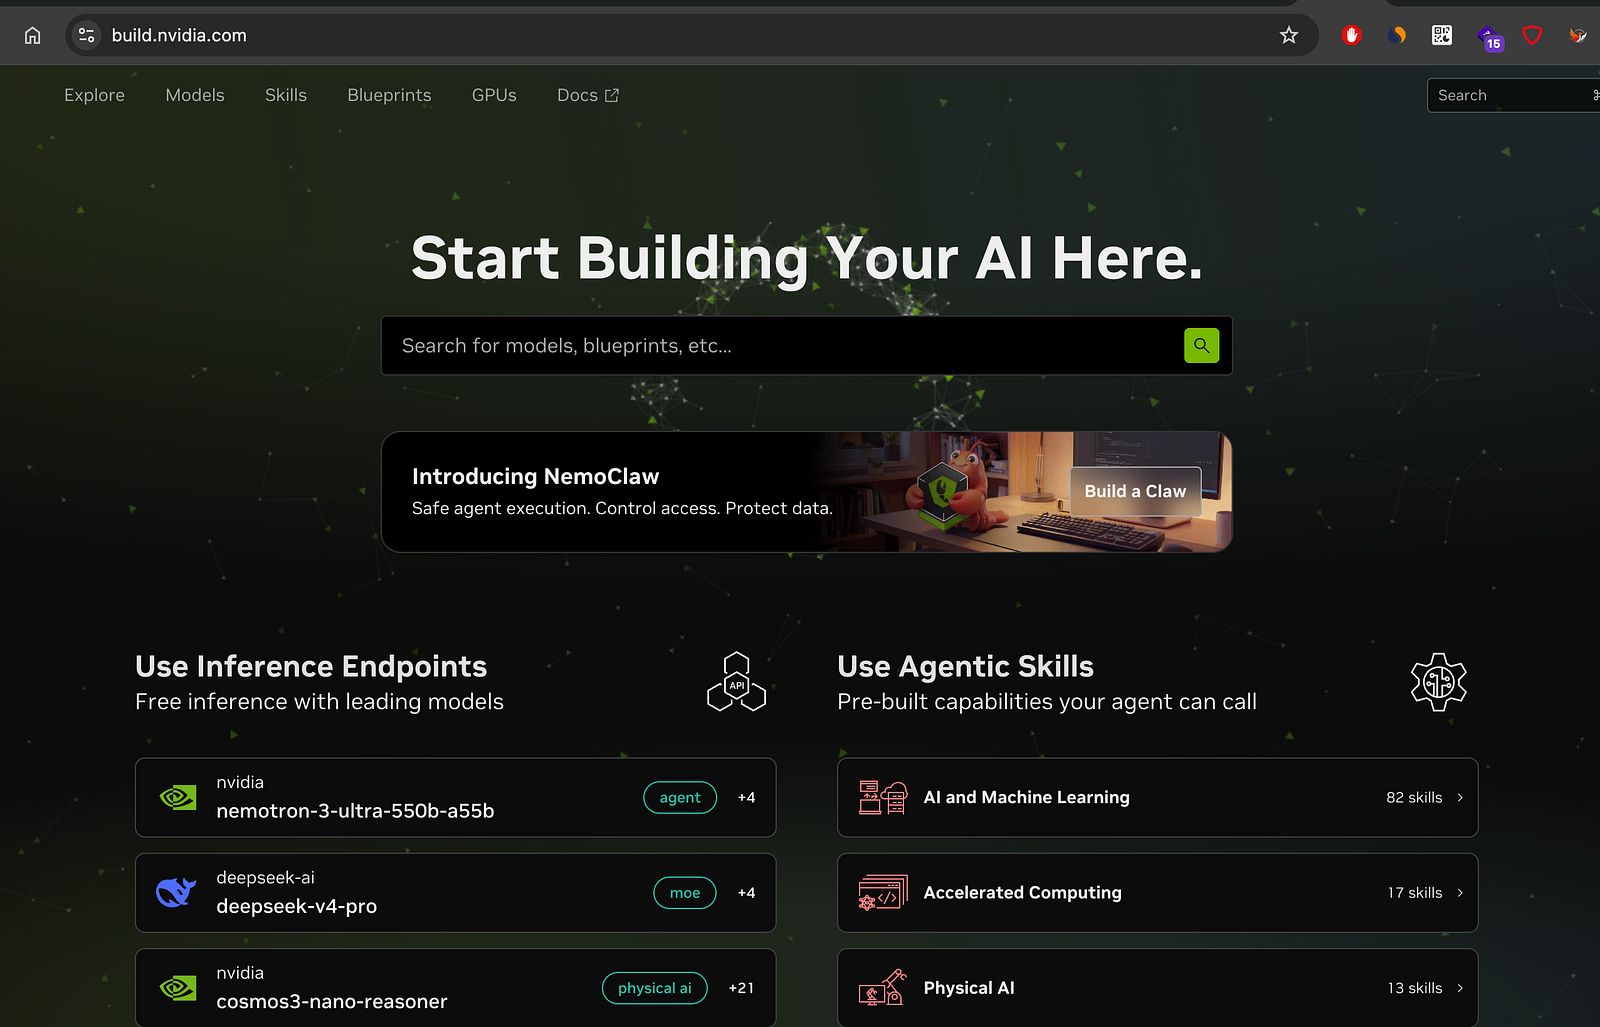
NVIDIA Build homepage
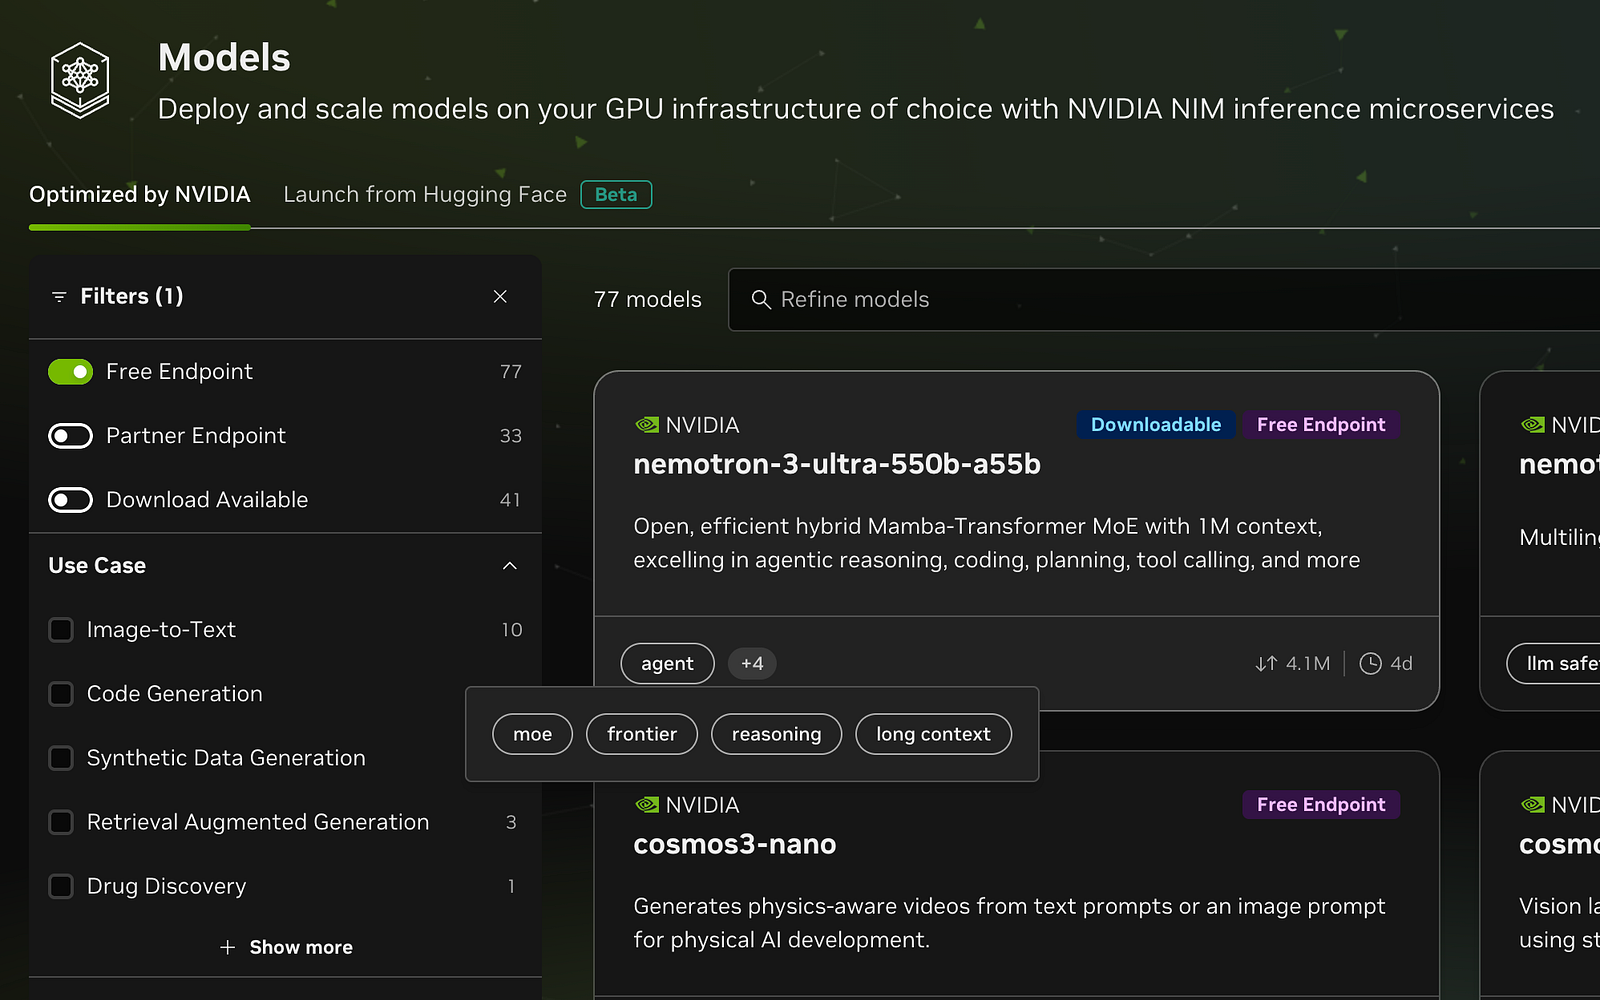
Step 2: Browse Available Models
Open the models catalog:
https://build.nvidia.com/models
You’ll find a large collection of models from different providers, including reasoning models, coding models, agentic AI models, and multimodal models.
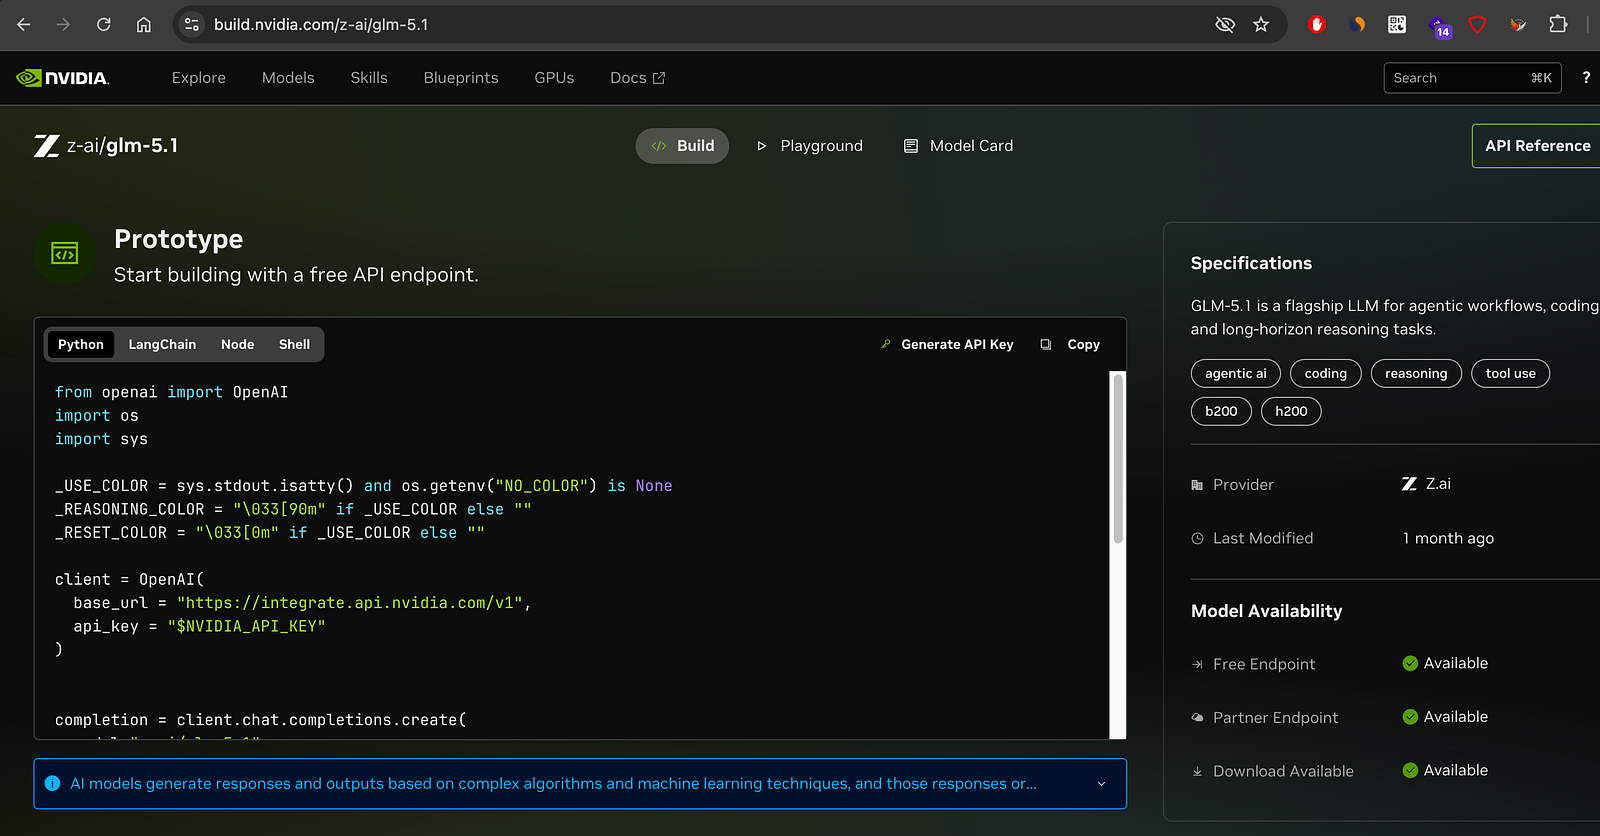
For this guide, we’ll use GLM 5.1.
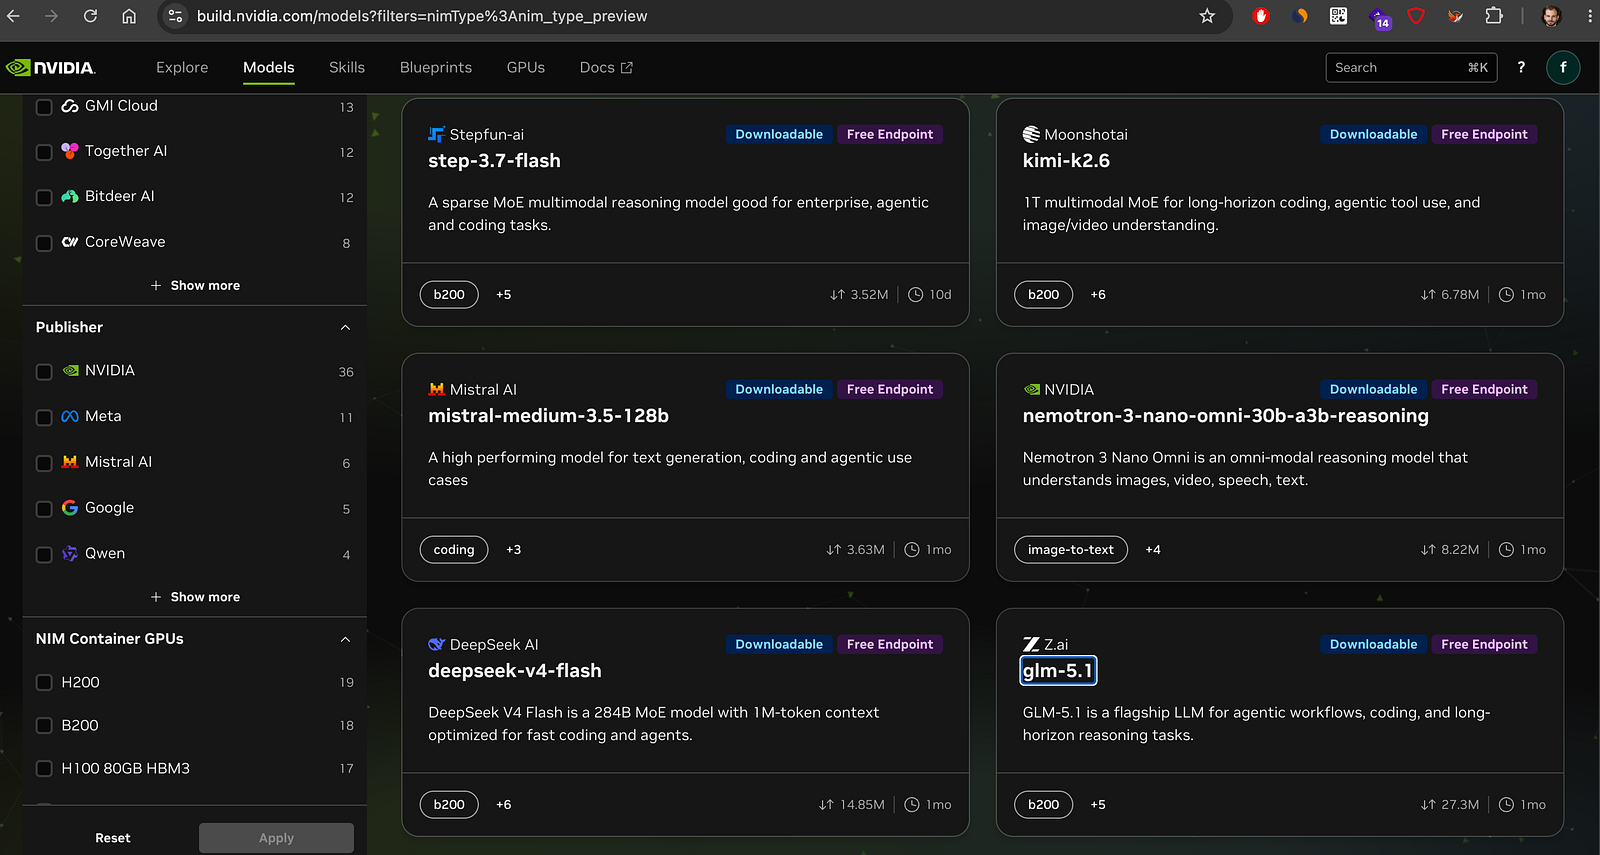
Free Models Available on NVIDIA Build
Many users don’t realize that NVIDIA Build offers several models that can be used for free.
At the time of writing, models such as GLM 5.1 and Kimi are available through NVIDIA Build’s free access program.
This makes NVIDIA Build a great option for GhostBro users who want to experiment with AI models before committing to a paid provider.
What Does “Free” Mean?
Free models allow you to:
Use GhostBro without purchasing credits from another AI provider.
Compare different AI models.
Test workflows and prompts.
Explore advanced AI capabilities at no cost.
Important: Free Models Have Limits
Free access comes with usage limits.
Depending on the model, NVIDIA may enforce:
Requests per minute
Requests per day
Token limits
Concurrent request limits
Temporary restrictions during peak demand
If you exceed these limits, you may receive quota or rate-limit errors until your allowance resets.
Before selecting a model, review its documentation and limits on NVIDIA Build.
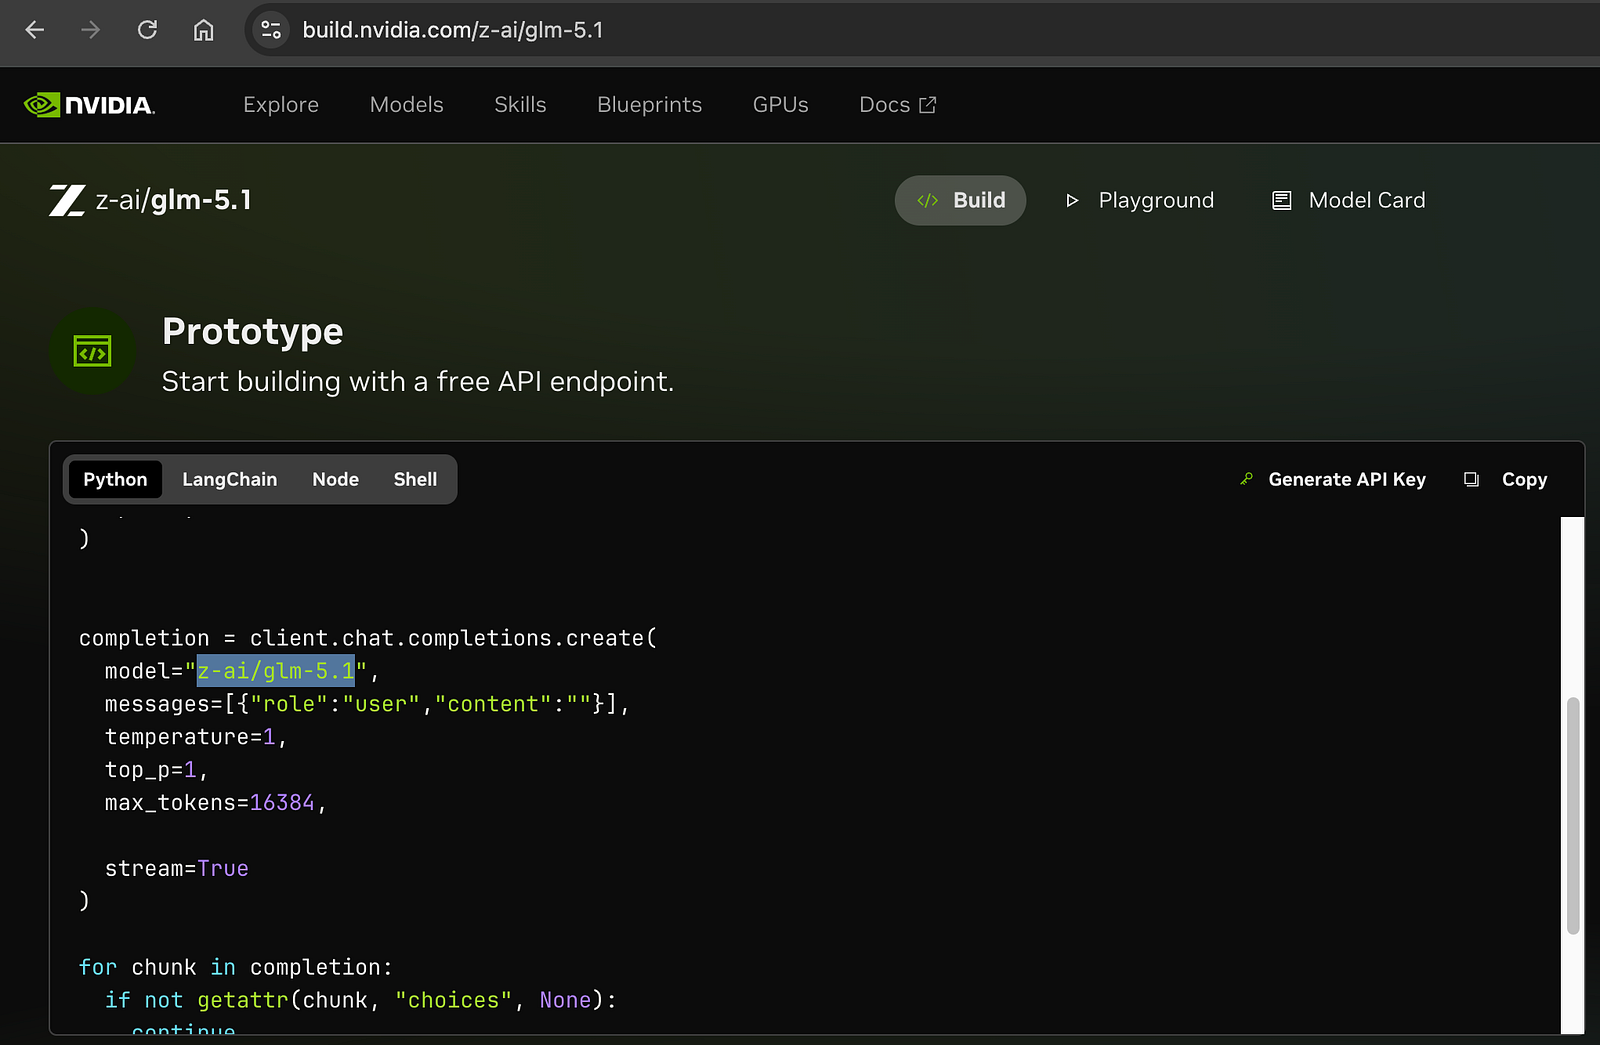
Step 3: Open the Model Page
Navigate to:
https://build.nvidia.com/z-ai/glm-5.1
Open the Build section and select the Code tab.
This page contains everything needed to connect the model to GhostBro.
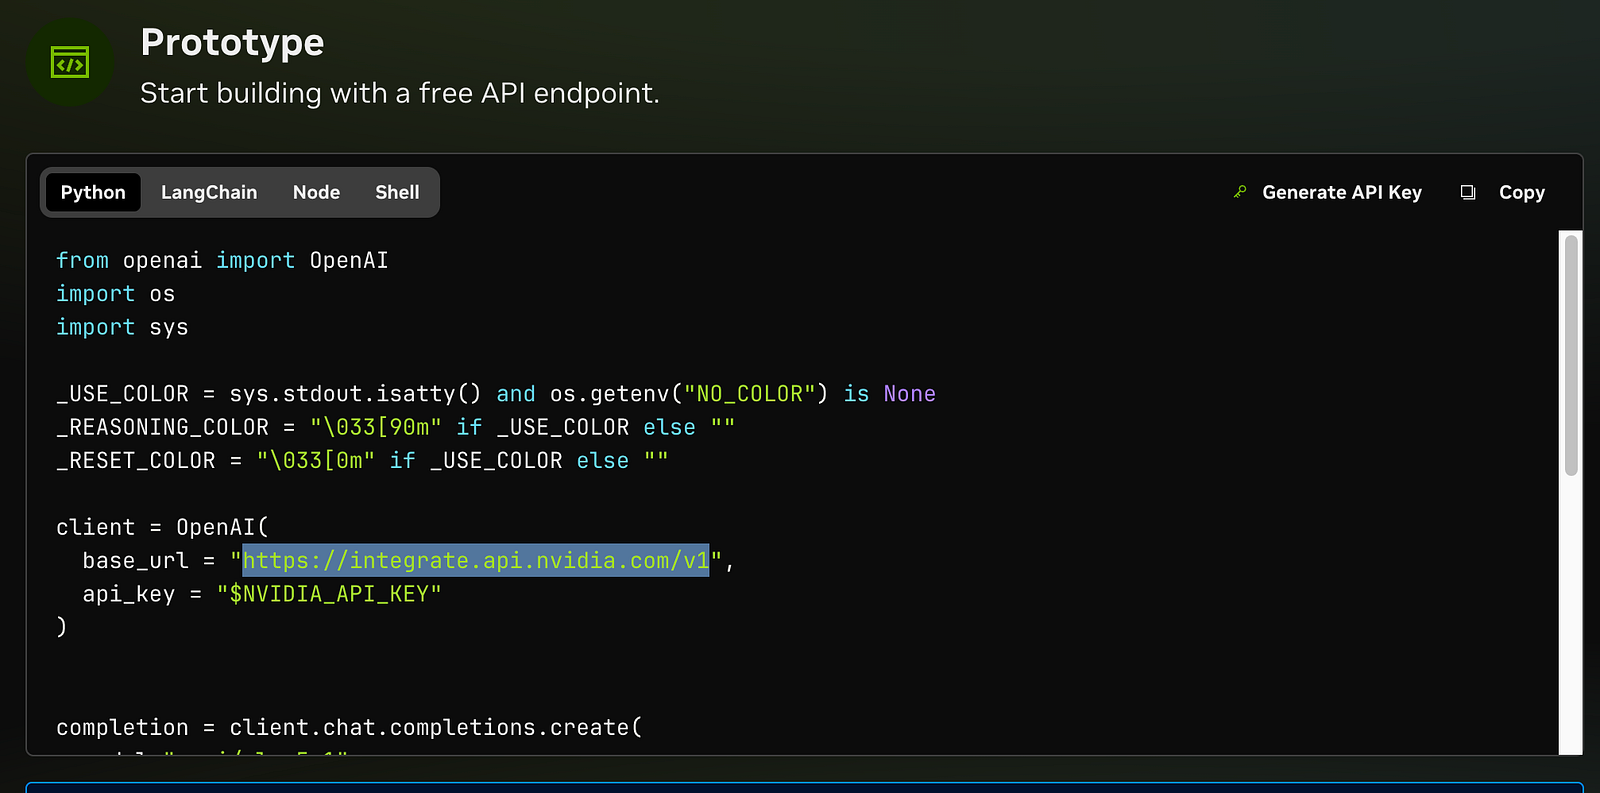
Step 4: Copy the Base URL
Inside the Build → Code section, locate the API endpoint.
At the time of writing:
https://integrate.api.nvidia.com/v1Copy this value.
In case that the URL looks like this
https://integrate.api.nvidia.com/v1/chat/completionsignore everything after the v1
You’ll use it when creating the custom provider in GhostBro.
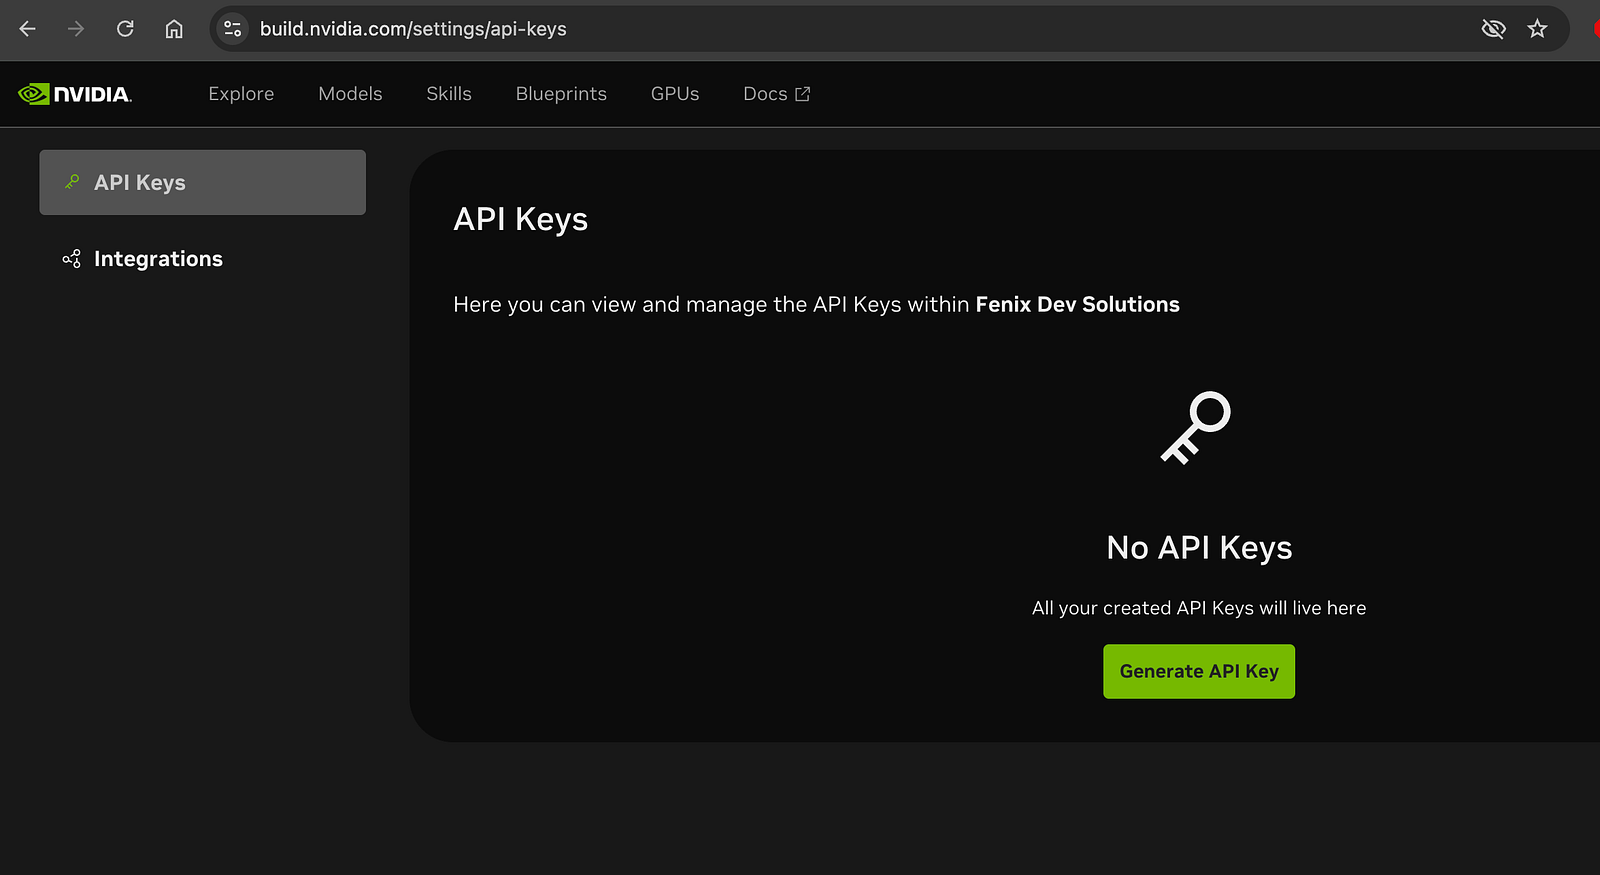
Step 5: Generate an API Key
You can generate an API key directly from the model page or from:
https://build.nvidia.com/settings/api-keys
Create a new API key and copy it.
Keep this key private, as it grants access to your NVIDIA Build account.
Step 6: Open GhostBro Settings
Launch GhostBro and navigate to:
Settings → API Keys
Scroll down to the Custom Providers section and click:
Add Custom Provider
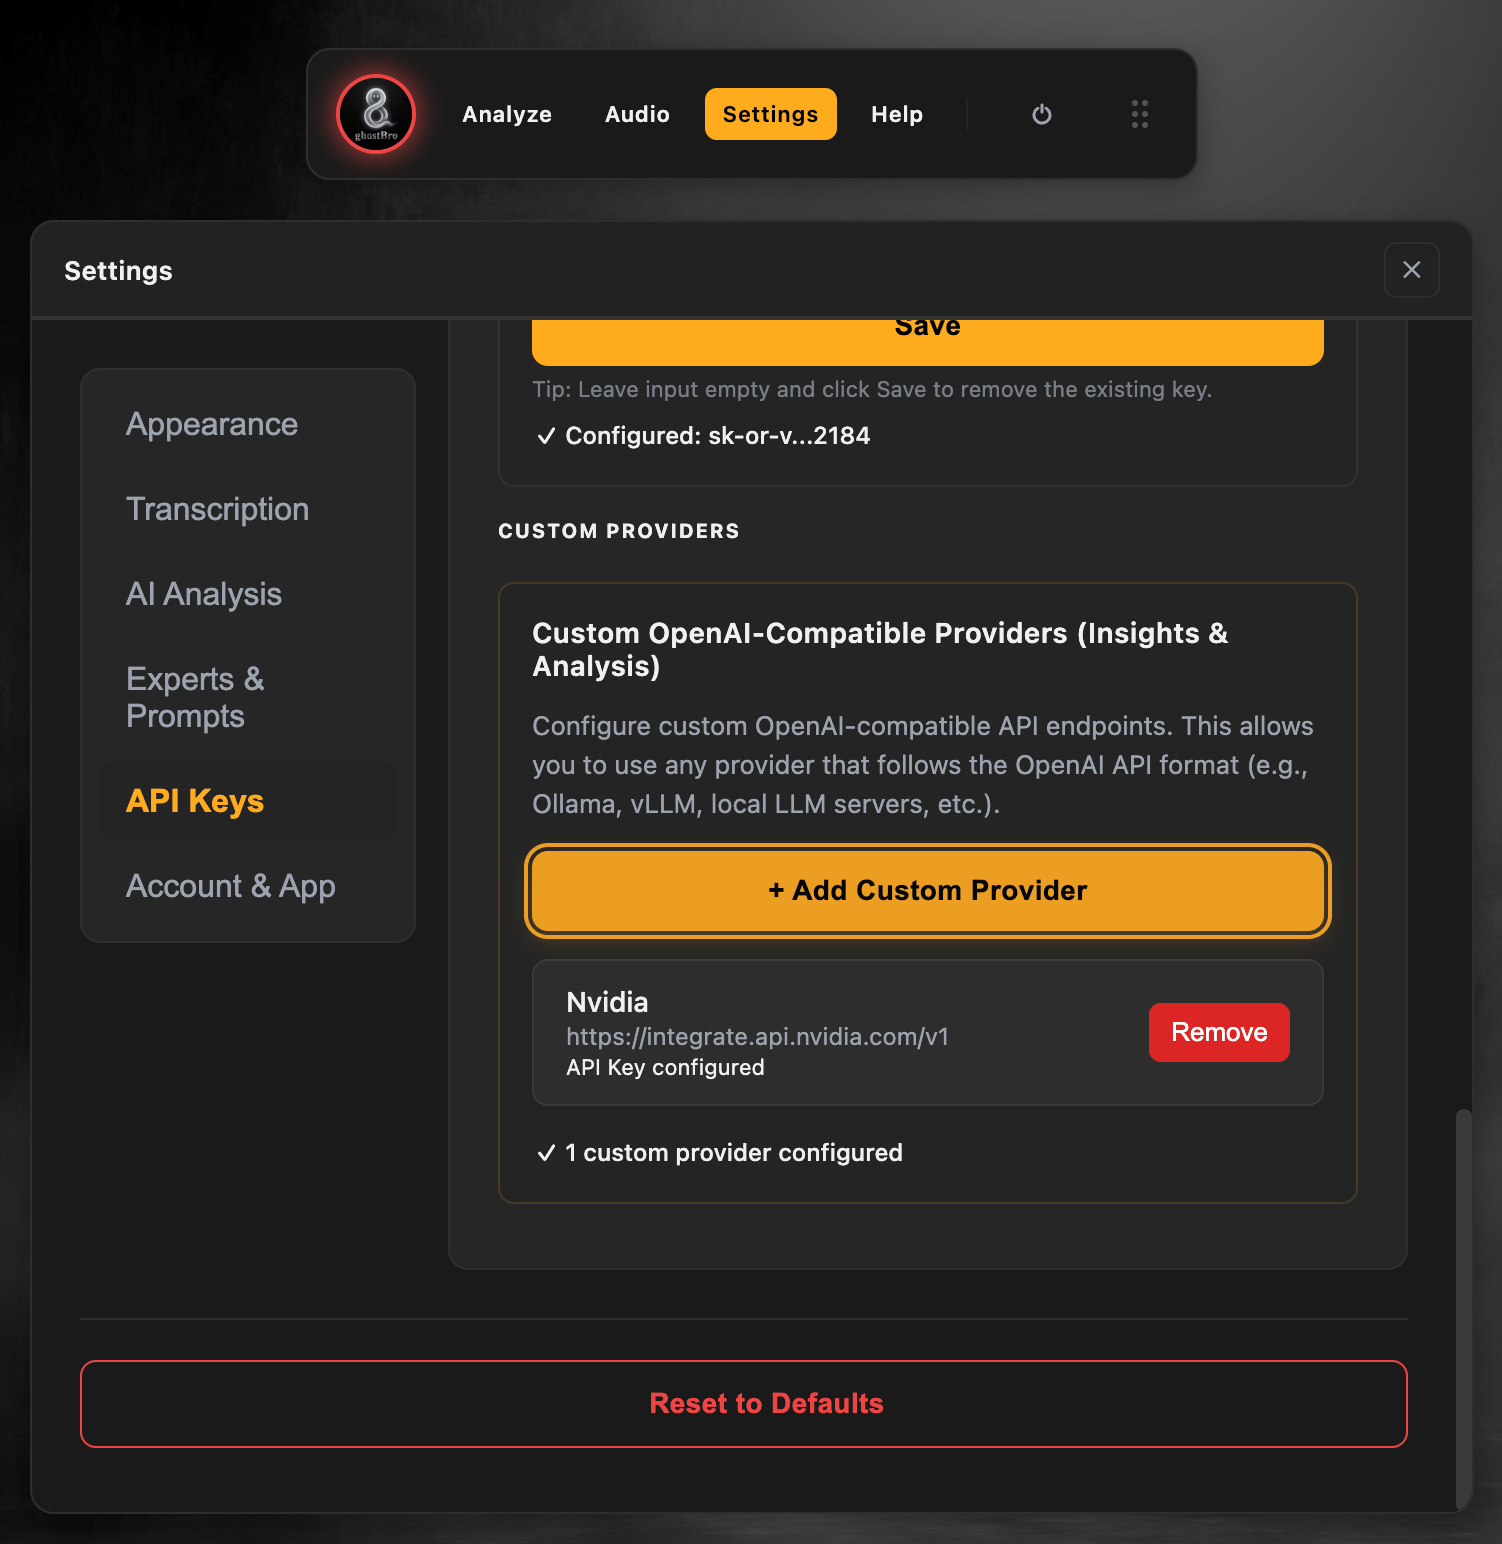
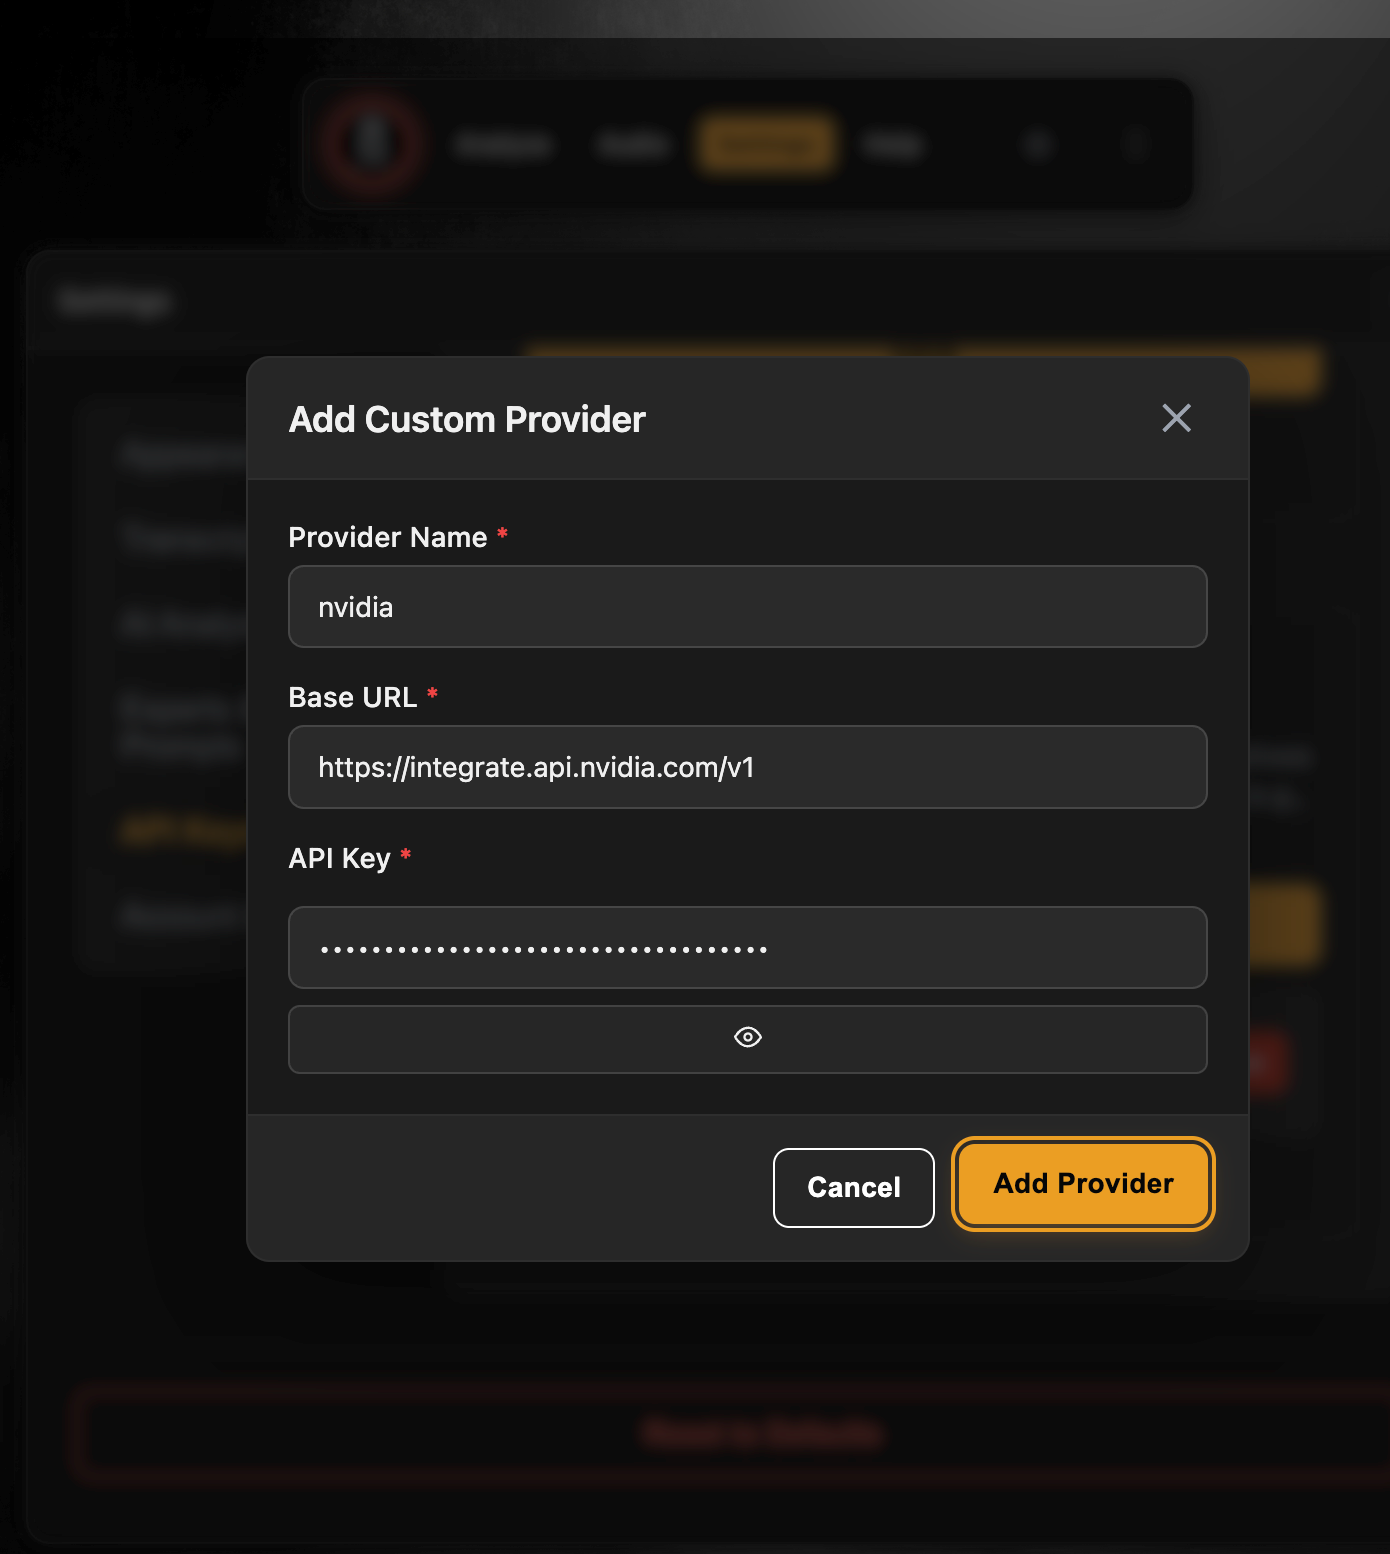
Step 7: Create the NVIDIA Provider
Fill the form using the values from NVIDIA Build.
Provider Name
nvidiaBase URL
https://integrate.api.nvidia.com/v1API Key
Paste the API key generated earlier.
Click:
Add Provider
Step 8: Understanding Model Capabilities
Before adding any model to GhostBro, it’s important to understand what the model can and cannot do.
Not all AI models support screenshots, images, or screen analysis.
Example: GLM 5.1
GLM 5.1 is primarily designed for:
Agentic AI workflows
Reasoning
Text generation
Meeting transcript analysis
Summarization
Question answering
Conversation analysis
GLM 5.1 works very well when GhostBro analyzes text generated from meeting transcripts.
However, GLM 5.1 does not support image understanding.
This means:
Meeting transcription analysis → Supported ✅
Smart Suggestions → Supported ✅
Summaries → Supported ✅
Screen Analysis → Not Supported ❌
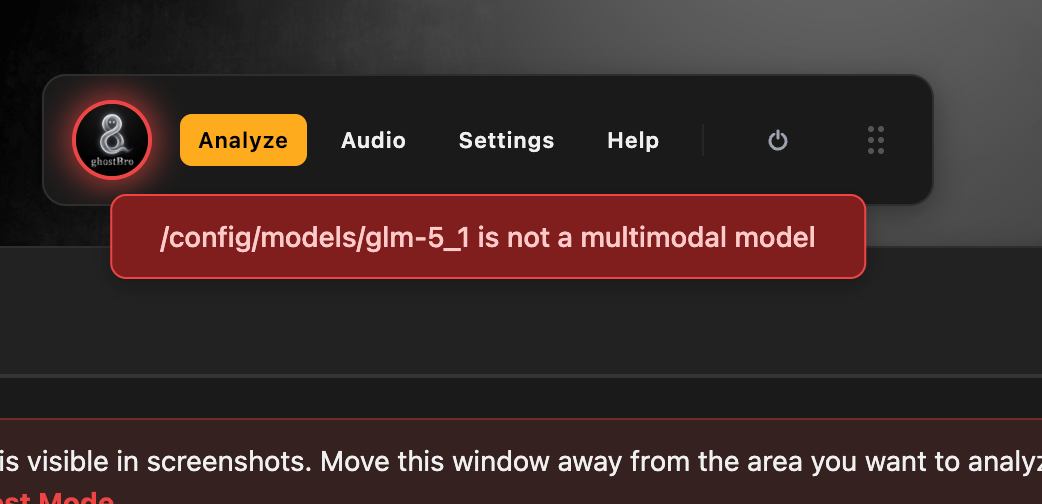
If you select GLM 5.1 for Screen Analysis, NVIDIA will reject the request and GhostBro will display an error such as:
glm5.1 is not a multi modal modelThis is expected because the model does not support image inputs.
Step 9: Choosing Models for Screen Analysis
If you want to use GhostBro’s Screen Analysis features, pay close attention to the model capabilities shown on NVIDIA Build.
Look for models that include tags such as:
Image-to-Text
Vision
Multimodal
Image Understanding
These models can analyze screenshots and visual content.
Models that only support text generation should be used for transcript analysis and text-based workflows.
Always review the model specifications before adding it to GhostBro.
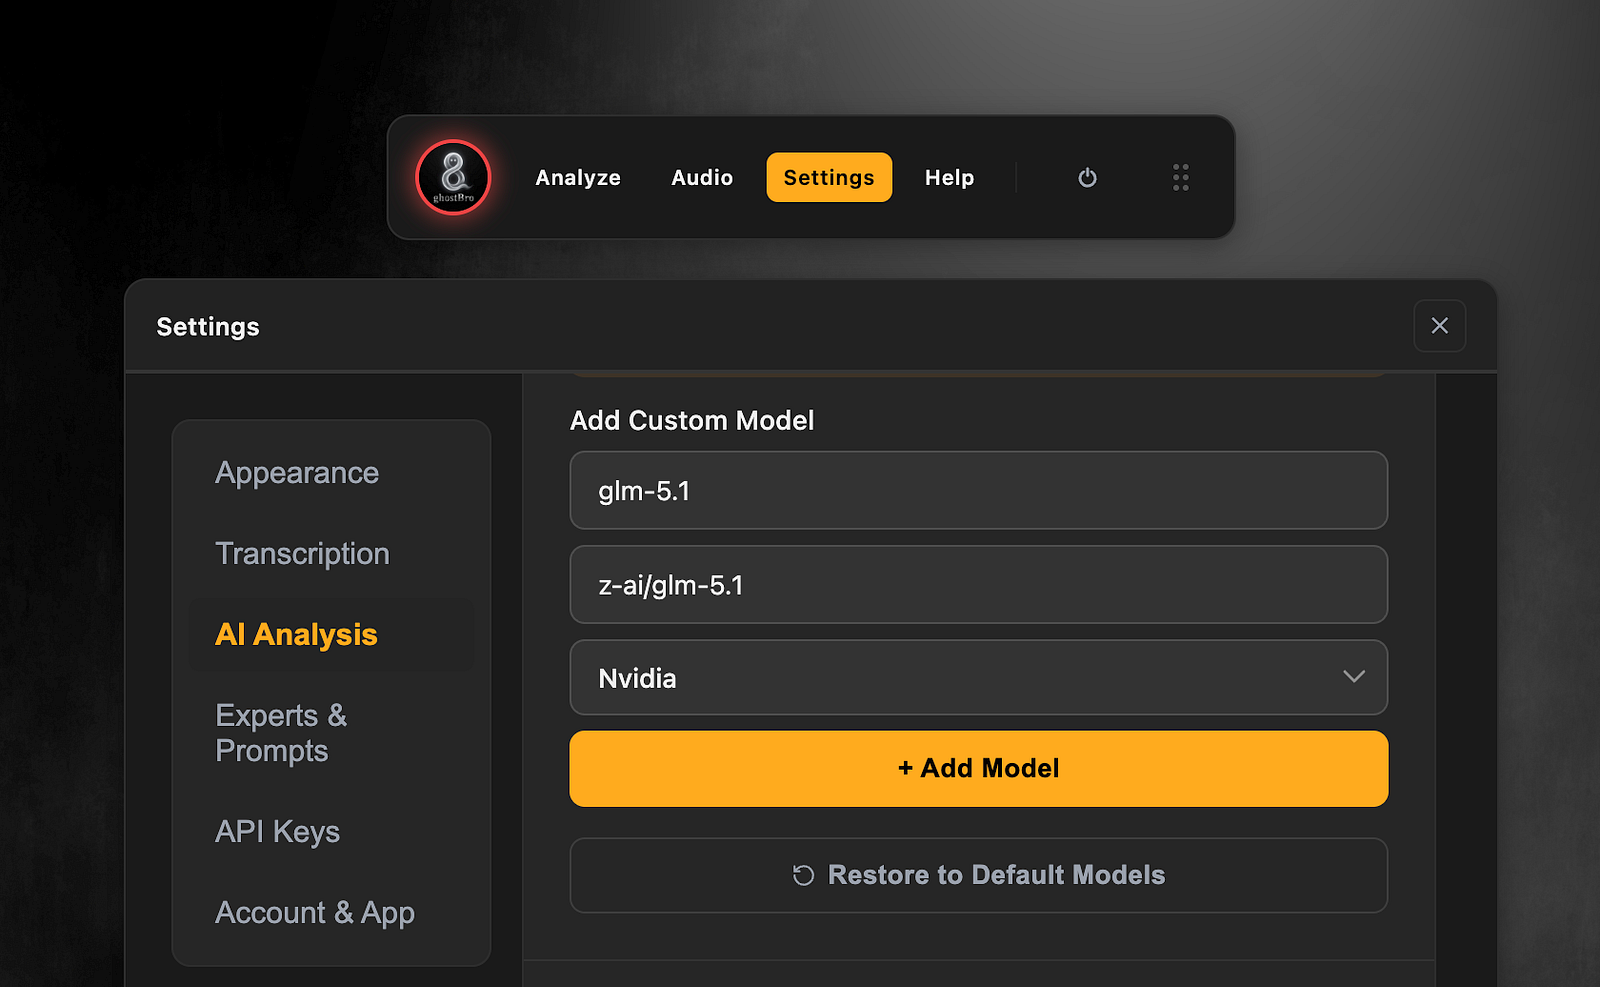
Step 10: Add the Model to AI Analysis
Open:
AI Analysis
Add a new model and select the provider you created.
Example:
Model name
glm5.1Model identifier
z-ai/glm-5.1Provider
NvidiaSave the configuration.
Step 11: Test the Connection
Run an AI Analysis task using the newly configured model.
If everything is configured correctly, GhostBro will send requests directly to NVIDIA’s API using your custom provider settings.
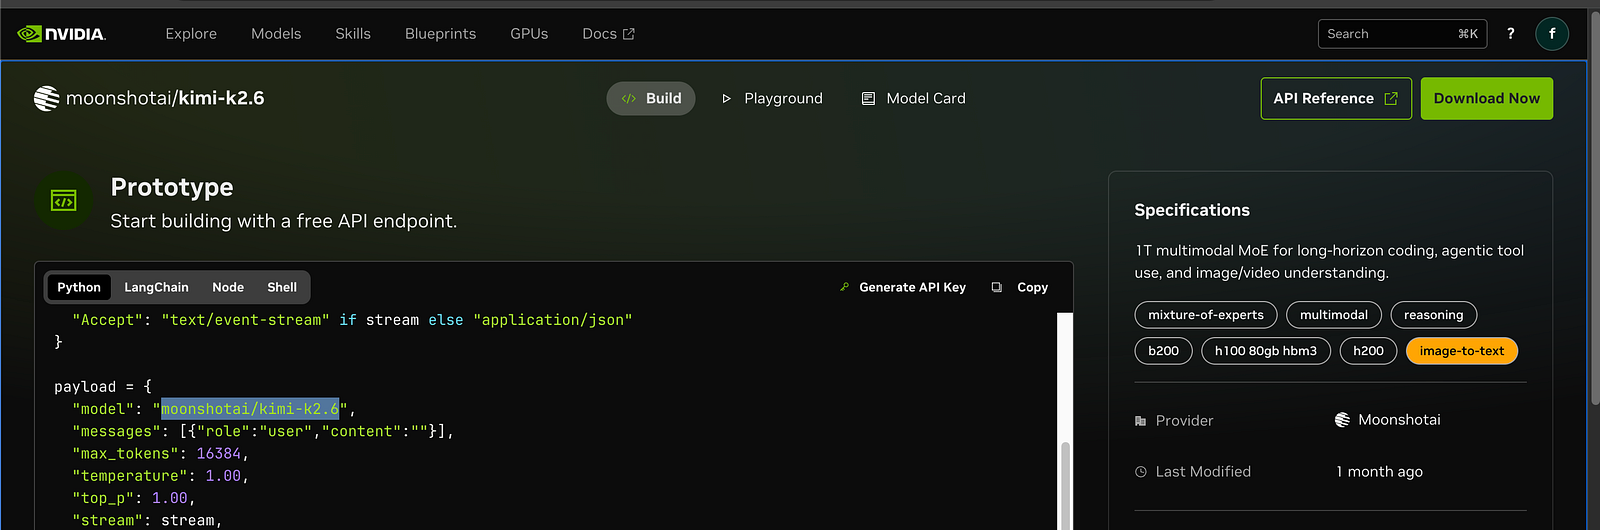
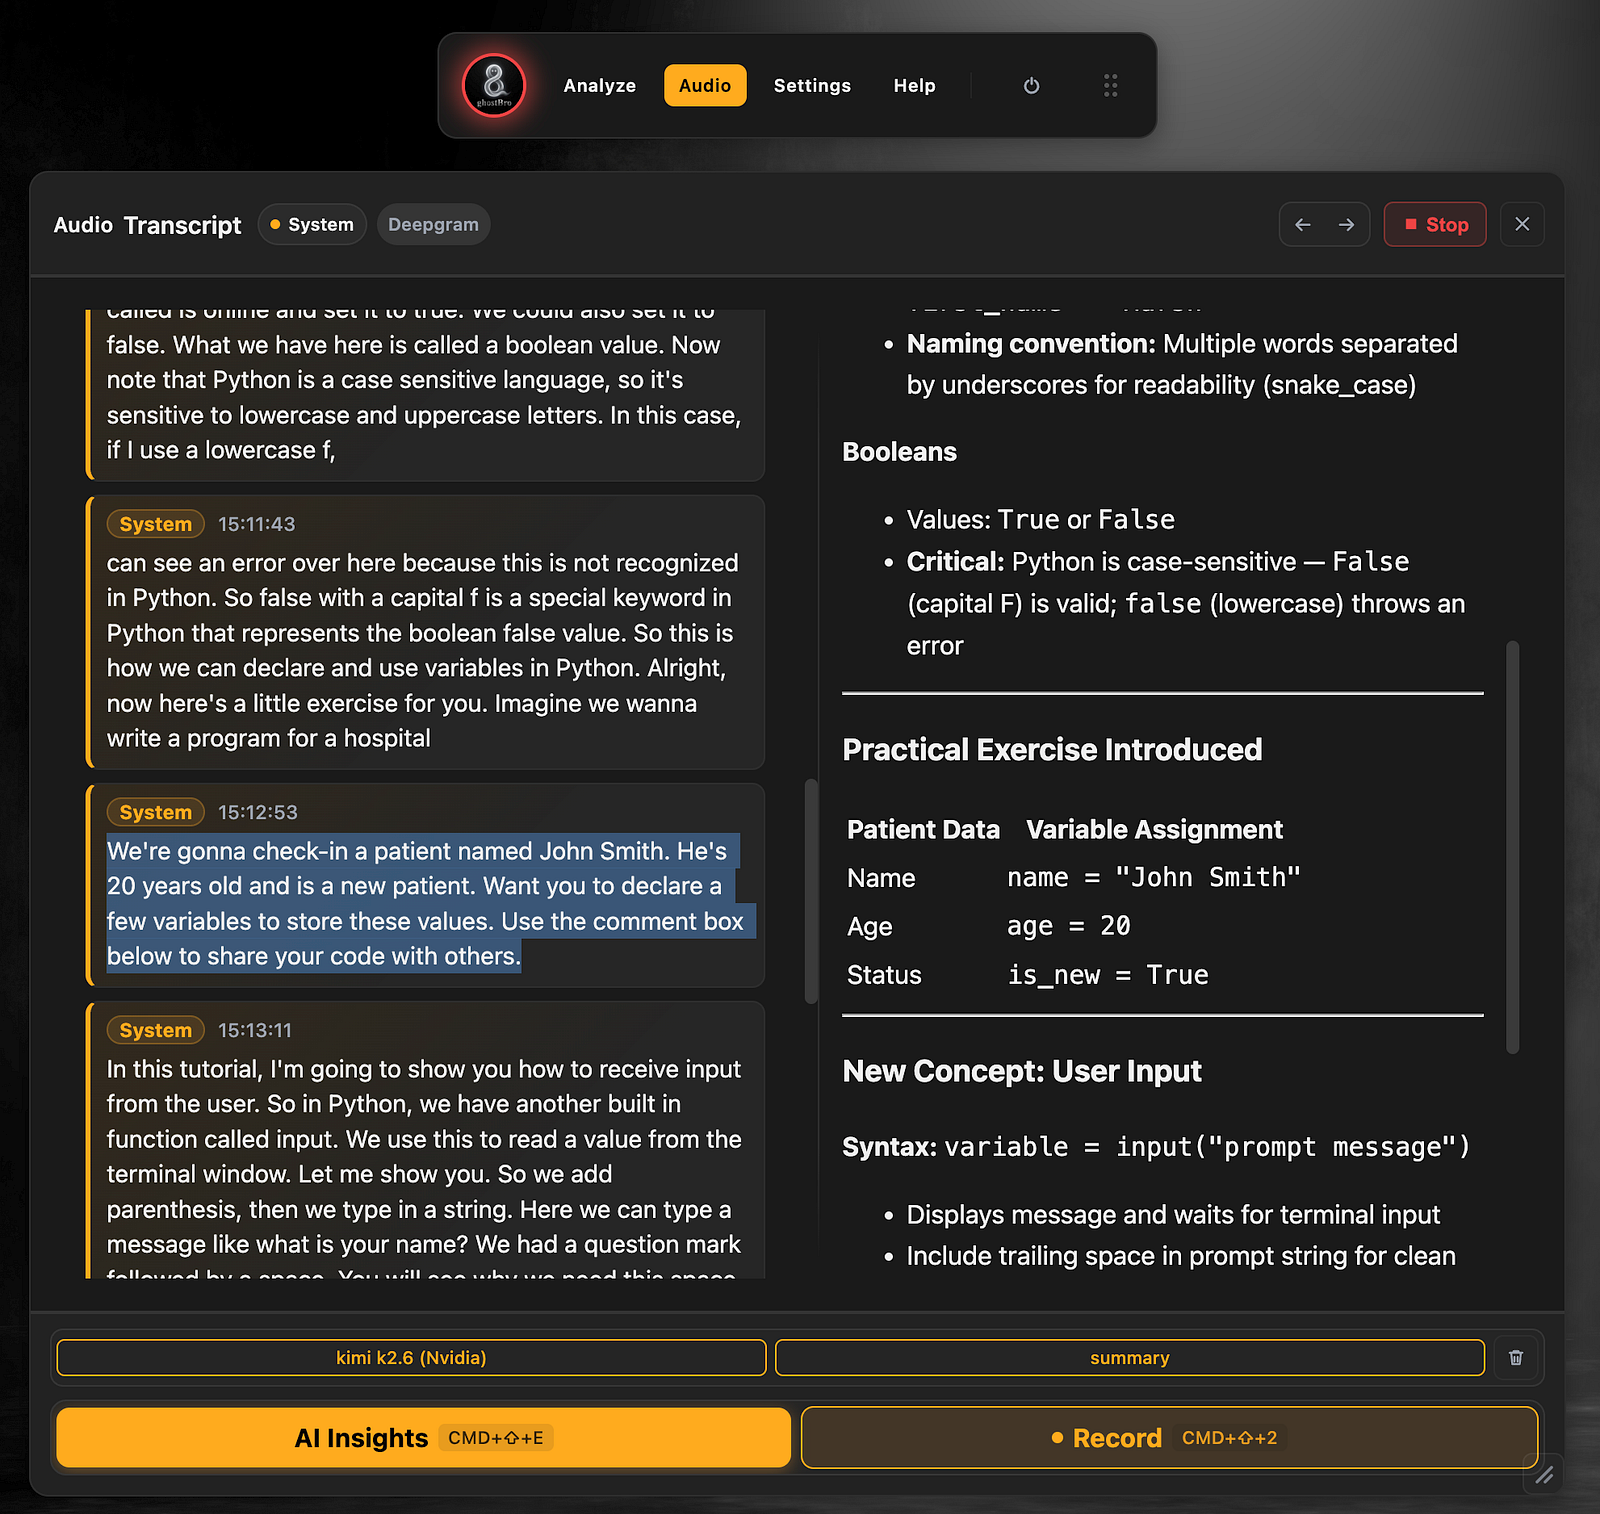
Let’s check an example with kimi 2.6 working with transcription.
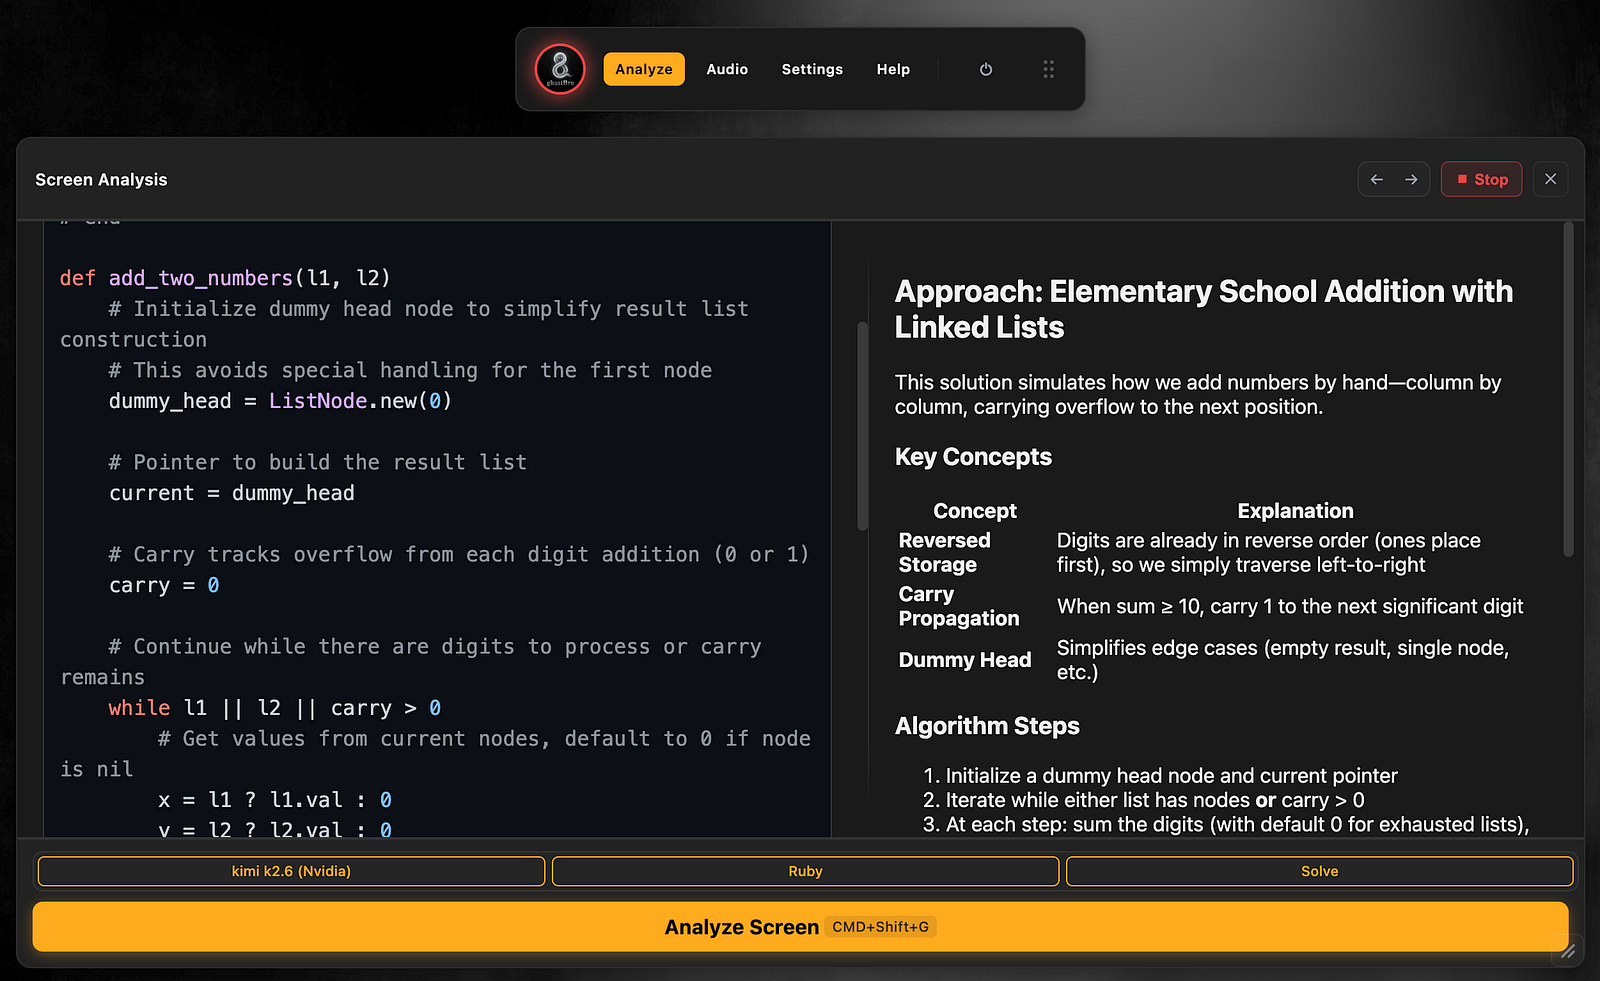
and here an example with screen analysis
Troubleshooting
“Request cannot be processed”
This usually means the selected model does not support the type of content being sent.
For example:
GLM 5.1 + transcript analysis → Supported ✅
GLM 5.1 + screen analysis → Not Supported ❌
Review the model’s capabilities on NVIDIA Build and choose a model that matches your use case.
Authentication Error
Verify that:
The API key is valid.
The API key was copied correctly.
The Base URL matches the value shown in NVIDIA Build.
Model Not Found
Verify that the model name entered in GhostBro matches the identifier shown on NVIDIA Build.
Final Thoughts
NVIDIA Build provides an excellent collection of free AI models that can be integrated into GhostBro in just a few minutes.
The setup process is simple:
Create a free NVIDIA Build account.
Choose a model.
Copy the Base URL from Build → Code.
Generate an API key.
Add a Custom Provider in GhostBro.
Configure the model in AI Analysis.
Verify that the model supports your intended use case.
For transcript analysis, meeting summaries, and agentic AI workflows, models such as GLM 5.1 and Kimi are excellent free options.
If you plan to use Screen Analysis, make sure to choose a model that explicitly supports image understanding capabilities such as Image-to-Text, Vision, or Multimodal processing.